Updated 3 weeks ago
How to properly use a Non Vacuum Blood Collection Tube for blood collection?

Admin

How to properly use a Non Vacuum Blood Collection Tube for blood collection?
One of the most basic procedures in clinical diagnostics is blood collection. The non vacuum blood collection tube is one of the types of collection systems, which are significant in case of the need to perform controlled manual collection. This paper serves as a comprehensive, search engine optimized tutorial on how to properly use a non vacuum blood collection tube, including preparation, step-by-step instructions, safety guidelines and best practices.
What is a Non Vacuum Blood Collection Tube?
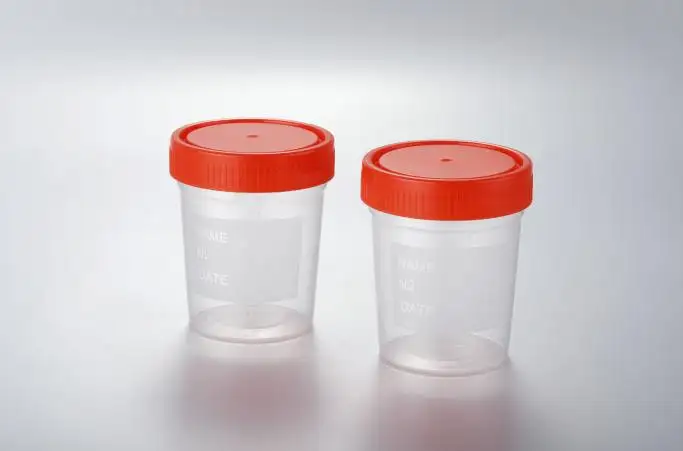
A non vacuum blood collection tube is a kind of sample collection tube that is not dependent on pre-defined negative pressure to automatically draw the blood. Rather, a syringe or transfer device is used to transfer blood to the tube manually.
Compared to vacuum blood collection systems, non vacuum tubes have greater flexibility in certain clinical scenarios, including:
· Pediatric blood collection
· Patients having weak veins.
· Red blood cell test Low blood volume sample.
· Laboratory testing needs which are specified.
· Field or emergency settings.
Depending on the needs of the test, these tubes can include additives like anticoagulants (EDTA, citrate, heparin) or can be simple.
The important characteristics of Non Vacuum Blood Collection Tubes.
These tubes have a structure and a functionality, which is important to understand in order to use them properly:
1. No A priori Negative Pressure.
It does not have a suction system and therefore blood has to be pumped out into the tube.
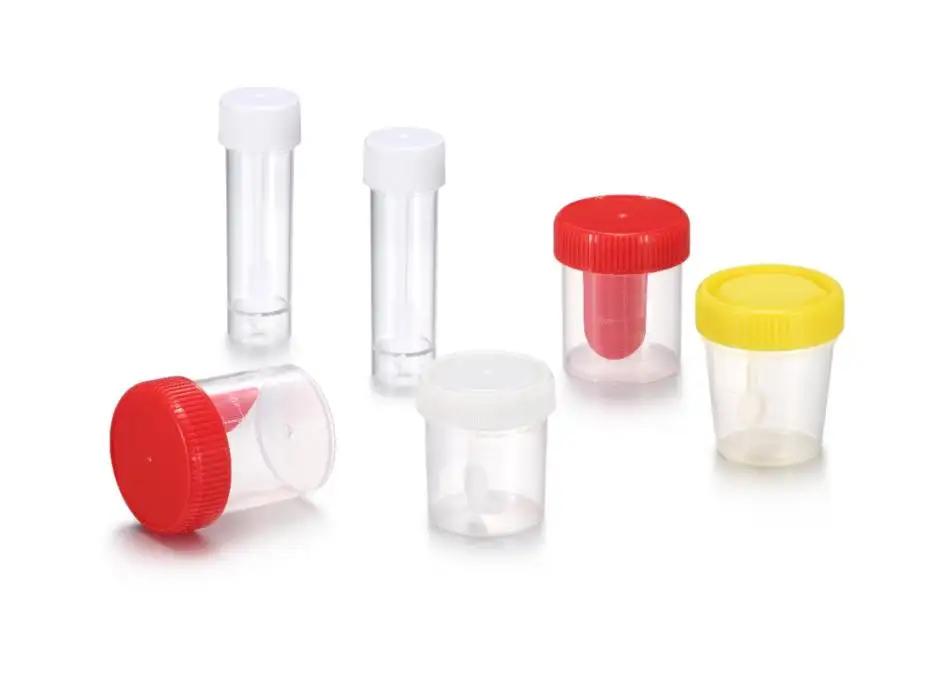
2. Additive Options
Various color-coded caps can signify various additives:
· Purple: EDTA (hematologic tests)
· Blue: Sodium citrate (coagulation tests)
· Green: Heparin (plasma chemistry)
· Red: No additive (serology/chemistry serum tests)
3. Single Use and Sterile.
The tubes are all sterile and should be used only by one patient.
4. Flexible Volume Control
Healthcare professionals are able to regulate the amount of blood taken.
Indications when Non Vacuum Blood Collection Tubes should be used.
Such tubes are desirable in certain clinical situations:
· Challenging patients with Venous access.
· Neonates and infants
· Individuals with clotting disorder.
· When there is a need to fill slowly and controlled.
· In the case of syringe-based collection.
Stepwise Instruction: Use of non vacuum blood collection tube.
The correct method is crucial in making correct test results and patient safety.
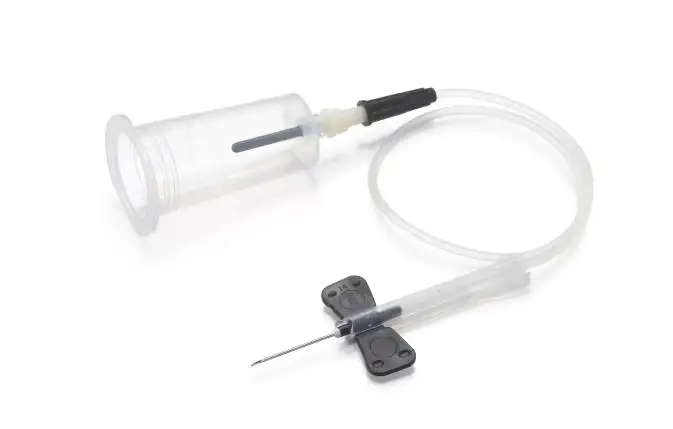
Step 1: Prepare Materials
Preparations Before beginning, be sure you have all the materials you need:
· Non vacuum blood collection tubes.
· Butterfly and needle set or sterile syringe and needle.
· Antiseptic solution or alcohol swabs.
· Gloves and PPE
· Tourniquet
· Sharps disposal container
· Labels for patient identification
Make sure that all the materials do not expire and that the sterile packaging is intact.
Step 2: Positioning and Identifying the Patient.
Patient identification is of utmost importance:
· Check patient name and ID.
· Give a clear explanation of the procedure.
· Place the patient in a comfortable position (sitting or lying down).
· Stretch the arm and choose an appropriate vein (usually median cubital vein).
Step 3: Perform Aseptic Skin Preparation
· Use tourniquet 7-10 cm above point of puncture.
· Clean the area with alcohol swab in a circular motion.
· Let the area dry out.
· Do not touch the puncture site after cleaning
Aseptic technique minimizes risk of infection and contamination.
Step 4: Blood Collection and Venipuncture.
· Insert needle into the vein with a suitable angle (15-30 degrees).
· After confirmed flow of blood, gradually draw necessary volume into syringe.
· Quick suction should be avoided as it may lead to hemolysis.
Step 5: Fill Blood into Non Vacuum Tube.
The most valuable step in this process:
· Take needle out of syringe.
· Carefully pour blood into the non vacuum tube.
· Let the blood be dripped slowly down the tube.
· Do not forcibly expel blood, to prevent hemolysis or foaming.
· Fill tube to the level needed depending on the requirement of the test.
In case of additives in the tube, it is essential to ensure a good volume ratio as the results would be incorrect.
Step 6: Mixing the Sample
After collection:
· Invert the tube between 5-10 times gently.
· Do NOT shake vigorously.
· Should there be anticoagulants, be sure to mix them properly.
Poor mixing can lead to the formation of clots or wrong laboratory results.
Step 7: Documentation and Labelling.
· Label the tube as soon as it has been collected.
· Add patient name, ID, date and time.
· Information on record collection in patient file/ LIS system.
Labelling helps to trace and avoid mix-ups of samples.
Step 8: Clean up and safe disposal.
· Put needle and syringe into sharps container.
· Dispose gloves and do hand hygiene.
· Clean the working place as per the infection control standards.
Best Practices in the use of Non Vacuum blood collection tubes.
To achieve quality collection of the sample, the best practices to adopt include:
1. Avoid Hemolysis
· When transferring blood, do not apply too much force.
· Do not shake tubes.
· Select correct needle size.
2. Have the right Blood-to-Additive Ratio.
Misappropriated volume may cause:
· Clotting
· False test results
· Laboratory rejection of sample.
3. Prevent Air Bubbles
Sample accuracy and coagulation tests may be influenced by air bubbles.
4. Draw in Proper Order.
When using several tubes, observe normal order to avoid cross-contamination.
Top 10 Things to keep in mind.
The errors that can be encountered even by the experienced professionals include:
· Overfilling or underfilling tubes.
· The poor mixing of collected samples.
· Working with tubes that have expired or damaged packaging.
· Delayed labeling
· Hemolysis due to rough handling.
These errors can be avoided, and it enhances the accuracy of diagnoses.
Benefits of Non Vacuum Blood Collection Tubes.
· Increased control of blood volume.
· Appropriate to weak patients.
· Less risk of vein collapse.
· Best suited to special lab tests.
· Plasticity to non standard environments.
Limitations
Although there are advantages, they also possess some limitations:
· Increased chances of contamination when not properly managed.
· Requires trained personnel
· A little slower process than vacuum systems.
· Greater reliance on hand method.
Conclusion
Non vacuum blood collection tube is a necessary device in contemporary clinical diagnostics, particularly in those instances when it is necessary to control it manually and do some specific work with it. Adequate technique such as aseptic preparation, prudent transference of blood and proper mixing is paramount in the achievement of accurate laboratory results and patient safety.
Healthcare professionals can enhance the quality of samples and the reliability of the diagnosis by adhering to standardized practices, as well as preventing typical errors.